Check the evenness of the substrate, line up the structural joints (1-3cm) and set the level of the installation plan. To prepare the adhesive, follow the manufacturer’s instructions and prepare the mixture using mechanical mixing elements to achieve a smooth product without lumps.
Step 3
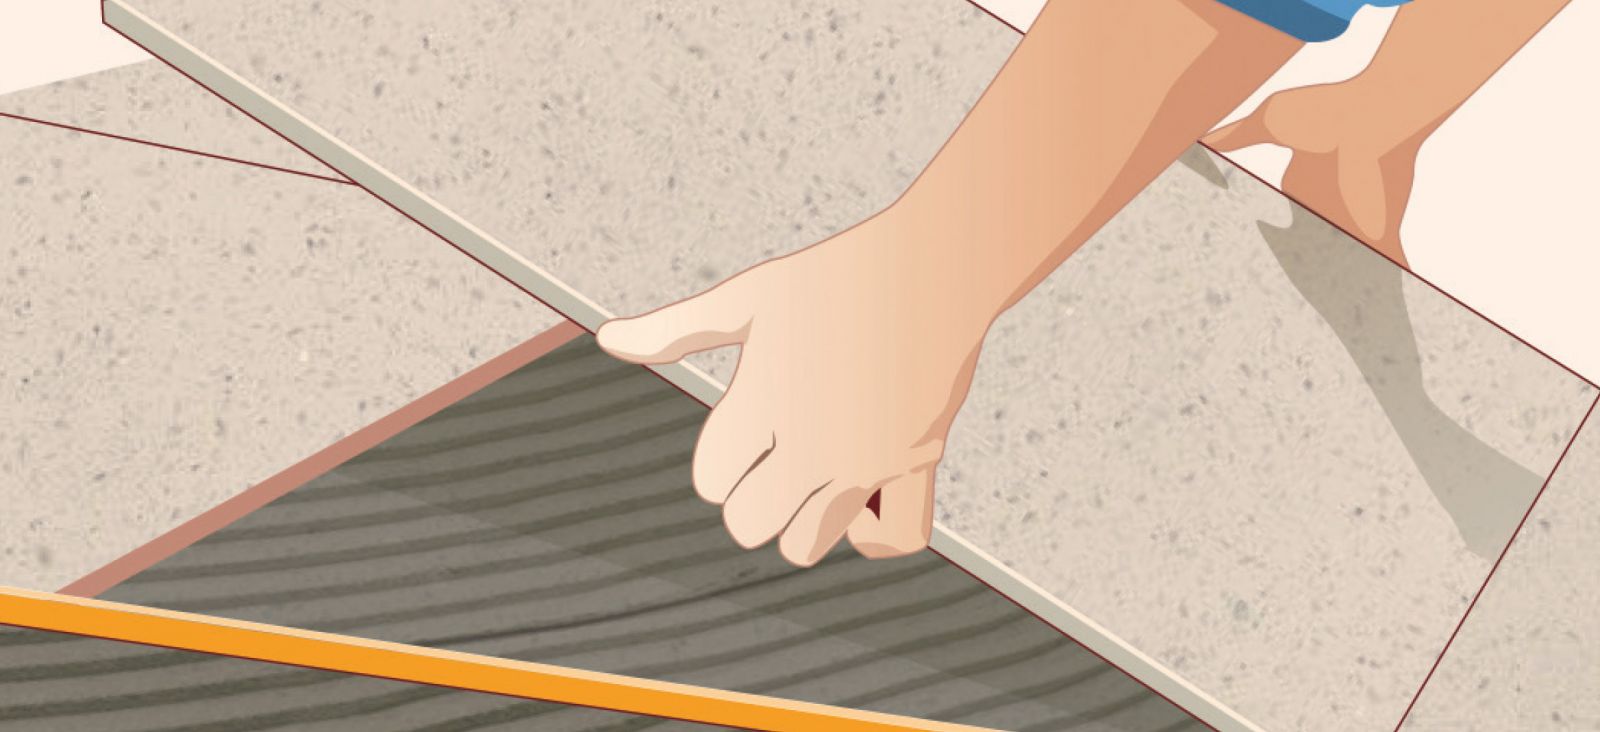
Spread the adhesive over the substrate and then comb it using a notched trowel. Spread and comb the adhesive onto the back of the tile (the back-buttering technique). Lay out the tiles paying close attention to the perimeter (4-5mm) and expansion (5mm) joints.
Step 4
Wait 24 hours after installing the flooring before starting work on the joints. Make sure joints are free of any traces of adhesive and apply the grout using a grout float. Clean the joints with a damp sponge or similar before the grout is fully set. .


 TRADITIONAL INSTALLATION SYSTEM
 .jpg)
.jpg)
.jpg)
.jpg)
.jpg)
.jpg)

.jpg)